JSON (Javascript Object Notation) is very light-weight, structured, easy to parse and much human-readable. JSON is the best alternative to XML when your android app needs to interchange data with your server.
The JSON format was originally specified and developed by Douglas Crockford and is described in RFC 4627 license.
The JSON filename extension is .json.
Advantage of JSON over XML
1) JSON is faster and easier than XML for AJAX applications.
2) Unlike XML, it is shorter and quicker to read and write.
3) It uses array.
JSON notation contains these basic elements:
1. JSON Objects:
A JSON object contains key/value pairs like a map. The keys are strings and the values are the JSON types. Keys and values are separated by a comma. The curly braces ({ }) represents the JSON object.
https://developer.android.com/reference/org/json/JSONObject
{
    "employee": {
        "firstname": "birjesh",
        "lastname": "gupta",
        "email": "XXXXXX@mail.com"
    }
}
Here, “employee” is the JSON Object name.
2. JSON Arrays:
https://developer.android.com/reference/org/json/JSONArray
The square bracket ([ ]) represents the JSON array.
"Employee" :
    [
     {"id":"101","name":"Ravi","salary":"50000"},
     {"id":"102","name":"Vimal","salary":"60000"}
    ]
Here, “Employee” is the JSON Array Name.
Example of Android JSON Parsing:-
now, we are going to see an example of JSON parsing in Android:
1. Create a new project in Android Studio from
File –>New Project and fill out the required details.
2. As we are fetching the JSON, we need to add INTERNET permission in AndroidManifest.xml file. Open AndroidManifest.xml and add the following permission.
<uses-permission android:name="android.permission.INTERNET" />
//AndroidManifest.xml

<?xml version="1.0" encoding="utf-8"?>
<manifest xmlns:android="http://schemas.android.com/apk/res/android"
    package="com.example.jsonparsing">
    <uses-permission android:name="android.permission.INTERNET" />

    <application
        android:allowBackup="true"
        android:icon="@mipmap/ic_launcher"
        android:label="@string/app_name"
        android:roundIcon="@mipmap/ic_launcher_round"
        android:supportsRtl="true"
        android:theme="@style/AppTheme">
        <activity android:name=".MainActivity">
            <intent-filter>
                <action android:name="android.intent.action.MAIN" />

                <category android:name="android.intent.category.LAUNCHER" />
            </intent-filter>
        </activity>
    </application>

</manifest>
3. Create Assets folder inside your project like below.
Right-click on the app
app –>new–>folder–>Assets folder–>Finish
Assets Folder Created.
4. Create a local JSON file in the Assets folder named sample.json like below.
Now Right-click on assets folder
assets folder–>new–>file–>filename.json–>ok
New JSON File Created.
write the below code in your JSON file
//JSON Example:
//sample.json
{"employee":[{
  "firstname": "birjesh",
  "lastname" : "gupta",
  "email": "XXXXXX@gmail.com",
  "gender": "male",
  "phone": "89XXXXXX98"
},
  {
    "firstname": "suresh",
    "lastname" : "singh",
    "email": "XXXXXX@gmail.com",
    "gender": "male",
    "phone": "87XXXXXX87"
  },
  {
    "firstname": "manish",
    "lastname" : "sharma",
    "email": "XXXXXX@gmail.com",
    "gender": "male",
    "phone": "96XXXXXX69"
  },
  {
    "firstname": "gourav",
    "lastname" : "ganguly",
    "email": "XXXXXX@gmail.com",
    "gender": "male",
    "phone": "90XXXXXX09"
  },
  {
    "firstname": "mohan",
    "lastname" : "batra",
    "email": "XXXXXX@gmail.com",
    "gender": "male",
    "phone": "87XXXXXX87"
  }
]
}
5. Open the layout file of the main activity (activity_main.xml) and add a ListView element like below.
//activity_main.xml

<?xml version="1.0" encoding="utf-8"?>
<LinearLayout xmlns:android="http://schemas.android.com/apk/res/android"
    xmlns:app="http://schemas.android.com/apk/res-auto"
    xmlns:tools="http://schemas.android.com/tools"
    android:layout_width="match_parent"
    android:layout_height="match_parent"
    tools:context=".activity.MainActivity">

    <ListView
        android:id="@+id/list_view"
        android:layout_width="wrap_content"
        android:layout_height="wrap_content"/>

</LinearLayout>
6. Create another layout file named list_view_item.xml with the following content. This will be used to render a single list item view.
//list_view_item.xml

<?xml version="1.0" encoding="utf-8"?>
<LinearLayout xmlns:android="http://schemas.android.com/apk/res/android"
    android:orientation="vertical"
    android:padding="10dp"
    android:layout_width="match_parent"
    android:layout_height="match_parent">

    <TextView
        android:id="@+id/person_name"
        android:layout_width="wrap_content"
        android:text="Name"
        android:layout_height="wrap_content"
        android:textSize="20sp"/>
    <TextView
        android:id="@+id/person_email"
        android:layout_width="wrap_content"
        android:layout_height="wrap_content"
        android:text="email"
        android:textSize="20sp"/>
    <TextView
        android:id="@+id/person_gender"
        android:layout_width="wrap_content"
        android:layout_height="wrap_content"
        android:text="gender"
        android:textSize="20sp"/>
    <TextView
        android:id="@+id/person_phone"
        android:layout_width="wrap_content"
        android:text="phone"
        android:layout_height="wrap_content"
        android:textSize="20sp"/>

</LinearLayout>
7. Create a java class named Constants.java and write below code to use get the value from JSON file and set to TextView.
//Constants.java

public class Constants {

    public static final String FIRST_NAME = "firstname";
    public static final String LAST_NAME = "lastname";
    public static final String EMAIL = "email";
    public static final String GENDER = "gender";
    public static final String PHONE = "phone";
    private HashMap<String,String> relateds;

    //getter method to get the json data
    public HashMap<String,String> getRelateds() {
        return relateds;
    }

    //setter method to set json data on textview
    public void setRelateds(HashMap<String, String> relateds) {
        this.relateds = relateds;
    }
}
8. Now, Open the MainActivity.java class and create a public String readJsonFromAssets() method to open and use the local JSON file as shown below:-
//readJsonFromAssets()

//Read and open the .json file
public String readJsonFromAssets()
    {
        String json = null;
        try {
            InputStream is = getAssets().open("sample.json");
            int size = is.available();
            byte[] buffer =new byte[size];
            is.read(buffer);
            is.close();
            json = new String(buffer,"UTF-8");
        } catch (IOException e) {
            e.printStackTrace();
        }
        return json;
    }
as we opened JSON file now in onCreate() method
loadJson() is called to get the JSON from the file. Once the JSON is fetched, it is parsed and each contact is added to an array list. Write below code in your MainActivity.java class.
But,
Also, note that I have used getJSONArray() or getJSONObject() method depending on the type of node.
//MainActivity.java

public class MainActivity extends AppCompatActivity {

    ArrayList<Constants> dataModel = new ArrayList<>();
    ListView listview;

    @Override
    protected void onCreate(Bundle savedInstanceState) {
        super.onCreate(savedInstanceState);
        setContentView(R.layout.activity_main);
        listview = findViewById(R.id.list_view);
        loadJson();
    }

    //Load json data from json file
    private void loadJson() {
        HashMap<String, String> map = null;
        try {
            JSONObject object = new JSONObject(readJsonFromAssets());
            JSONArray jarray = object.getJSONArray("employee");

            for(int i=0; i<jarray.length();i++)
            {
                //create Constants class object to call getter method
                Constants constant = new Constants();
                JSONObject obj = jarray.getJSONObject(i);
                 map = new HashMap<>();

                map.put(Constants.FIRST_NAME,obj.getString(Constants.FIRST_NAME));
                map.put(Constants.LAST_NAME,obj.getString(Constants.LAST_NAME));
                map.put(Constants.EMAIL,obj.getString(Constants.EMAIL));
                map.put(Constants.GENDER,obj.getString(Constants.GENDER));
                map.put(Constants.PHONE,obj.getString(Constants.PHONE));

                //Add json data to setter method of Constants class
                constant.setRelateds(map);

                //Add object to Arraylist
                dataModel.add(constant);
            }
            CustomViewAdapter customAdaptor = new CustomViewAdapter(this, dataModel);

            listview.setAdapter(customAdaptor);

        } catch (JSONException e) {
            e.printStackTrace();
        }
    }

   //Read and open .json file
    public String readJsonFromAssets()
    {
        String json = null;
        try {
            InputStream is = getAssets().open("sample.json");
            int size = is.available();
            byte[] buffer =new byte[size];
            is.read(buffer);
            is.close();
            json = new String(buffer,"UTF-8");
        } catch (IOException e) {
            e.printStackTrace();
        }
        return json;
    }
}
9. Create a CustomViewAdapter.java class which extends BaseAdapter.class and implements its methods to set JSON string values into your TextView like below.
Write below code into you CustomView class.
//CustomViewAdapter extends BaseAdapter


public class CustomViewAdapter extends BaseAdapter {

    Context context;
    ArrayList<Constants> datamodel;
    public CustomViewAdapter(Context context, ArrayList<Constants> dataModel) {
        this.context = context;
        this.datamodel = dataModel;
    }

    @Override
    public int getCount() {
        return datamodel.size();
    }

    @Override
    public Object getItem(int i) {
        return null;
    }

    @Override
    public long getItemId(int i) {
        return 0;
    }

    @Override
    public View getView(int position, View view, ViewGroup parent) {

        TextView name,email,gender,phone;

        LayoutInflater inflater = (LayoutInflater) context.getSystemService(Context.LAYOUT_INFLATER_SERVICE);
        View itemview = inflater.inflate(R.layout.list_view_item, parent, false);

        name = itemview.findViewById(R.id.person_name);
        email = itemview.findViewById(R.id.person_email);
        gender = itemview.findViewById(R.id.person_gender);
        phone = itemview.findViewById(R.id.person_phone);

        name.setText(datamodel.get(position).getRelateds().get(Constants.FIRST_NAME)
                +" "+datamodel.get(position).getRelateds().get(Constants.LAST_NAME));

        email.setText(datamodel.get(position).getRelateds().get(Constants.EMAIL              ));
        gender.setText(datamodel.get(position).getRelateds().get(Constants.GENDER));
        phone.setText(datamodel.get(position).getRelateds().get(Constants.PHONE));

        return itemview;
    }
}
LayoutInflater inflater = (LayoutInflater) context.getSystemService(Context.LAYOUT_INFLATER_SERVICE);
        View itemview = inflater.inflate(R.layout.list_view_item, parent, false);
LayoutInflater is used to inflate the list_view_item.xml file.
        name.setText(datamodel.get(position).getRelateds().get(Constants.FIRST_NAME)
                +" "+datamodel.get(position).getRelateds().get(Constants.LAST_NAME));
In the above code, simply I concat the firstname and lastname using (+) operator.
If you run the project, you can see JSON data populated into list view as shown in the below image.

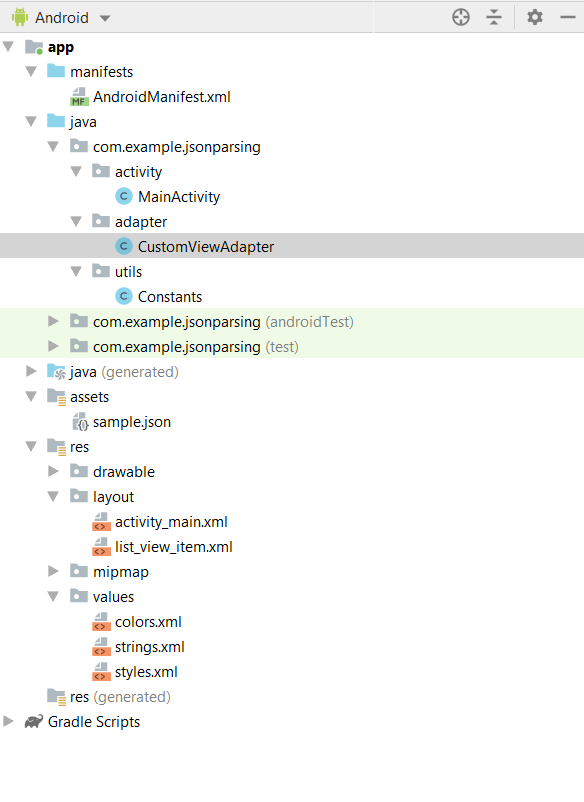
Project Structure Must be like below:-